Units 1 & 2
Unit 1: Introduction to creative media methods and skills.
Unit 2: Introduction to production techniques in creative media
Podcast research
Facts and information about the moon landing being faked:
I watched this video for ‘evidence’ that the moon landing was faked:
It’s by a YouTuber named Shane Dawson who often talks about different conspiracy theories and researches and asks others for any evidence.
Other people’s views
Shane Dawson is neutral and chooses only to discuss potential evidence.
Marion Cotillard, Whoopi Goldberg, Nick Knowles among others all believe the moon landing was faked.
Other podcasts:
I researched other conspiracy theory / horror podcasts and listened out for the sort of music and sound effects they used:
https://tunein.com/podcasts/True-Crime-Podcasts/Criminal-p682178/
https://tunein.com/podcasts/Paranormal/The-Paranormal-Podcast-p44789/
https://tunein.com/podcasts/Fantasy–Science-Fiction-Podc/Conspiracy-Theories-p1091108/
After listening to these podcasts I researched music that sounded creepy but didn’t get annoying on repeat, so a clip that lasts 2-3 minutes preferably. I also researched tension adding sound effects as I realised they were used in high tension points in the podcasts, like when new evidence was revealed or something possibly terrible had been done.
Editing my podcast
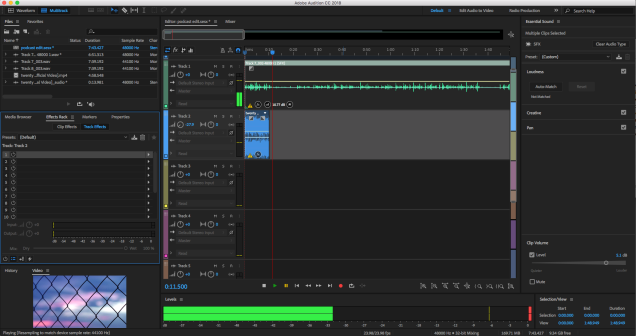
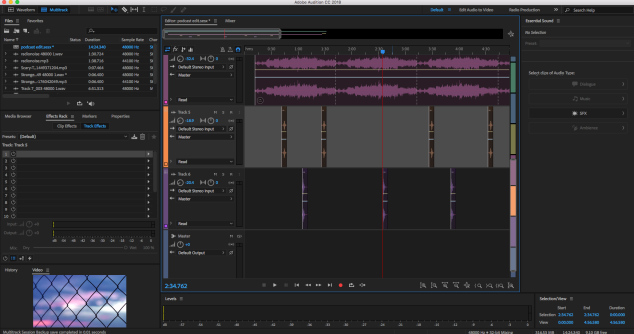
To start, I had to change my only other person in my podcast to Ella so I edited the script. To begin editing my podcast I had to sync my audio onto adobe audition:
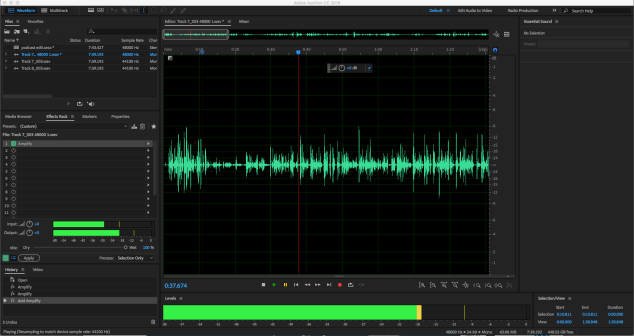
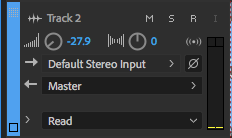
After listening to the audio I realised that Ella’s audio was a bit quieter than mine so I added an amplifier effect to her parts:
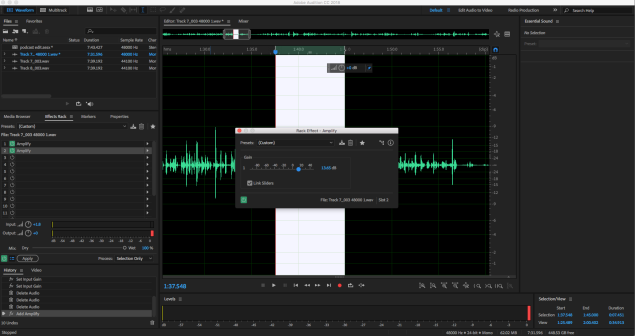
I then wanted to make sure the podcast could still be heard at a lower volume instead of going silent before 0 so I adjusted the overall volume:
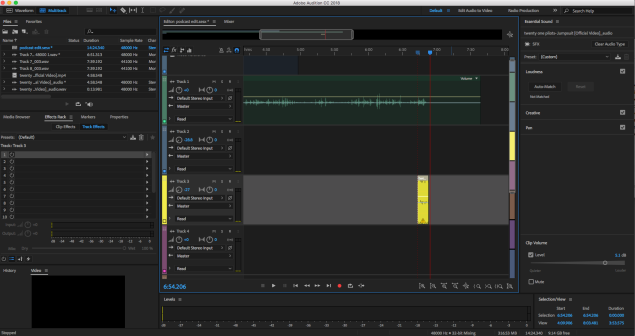
After this, I wanted to add an intro track and decided on a part of the Twenty One Pilot’s song ‘Jumpsuit’, copyright tested it and added the part I wanted over my intro:
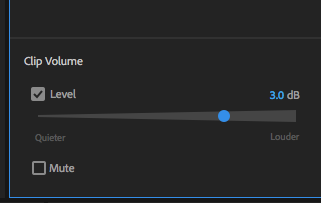
obviously at first it was too loud and I couldn’t hear the dialogue so I adjusted the track volume and reduced it:
I wanted the same track at the same volume to be my outdo music, so I clicked and dragged over the track, copied it and pasted it into the third row over the outdo of my podcast:
After doing the intro and outro tracks I needed a music bed. After listening to other podcasts and YouTube videos I decided on a creepy track free for download and added it as another track:
I put it in between the outro and intro over the dialogue. But in order to do this, because the audio clip was shorter than my podcast, I had to loop the track audio, so I right-clicked over it and pressed ‘loop’:
After this I started thinking about adding sound effects, so I researched some free ones to download with the genre of horror and mystery and found some:


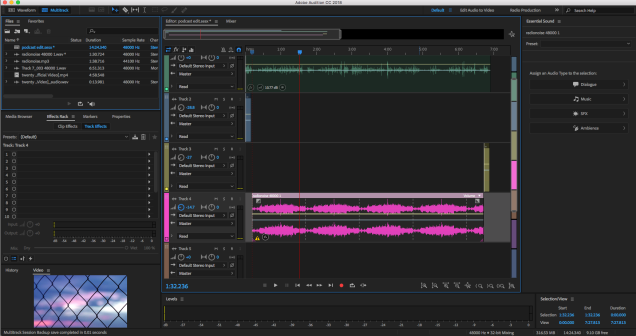
I then added them to the scary parts of my dialogue, like when I revealed a new piece of evidence as track 5 and 6, copying and pasting theta different points:
After all this I made a few more adjustments to the tracks’ volumes to make sure they didn’t overlap the dialogue:

After finishing the audition editing, I needed to add in the cover for my podcast (created by me using powerpoint):
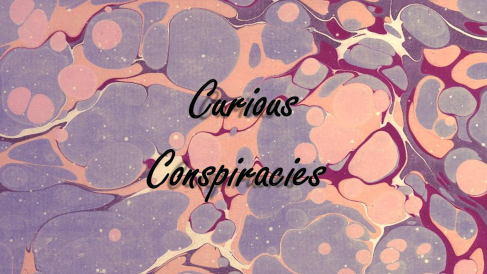
To add it I exported my podcast into premiere:

Along with my cover and stretched the cover to throughout my podcast:
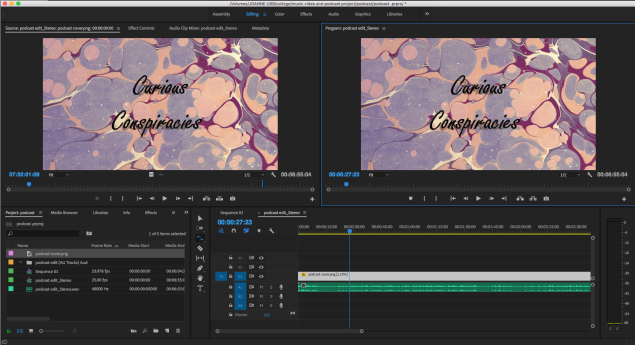
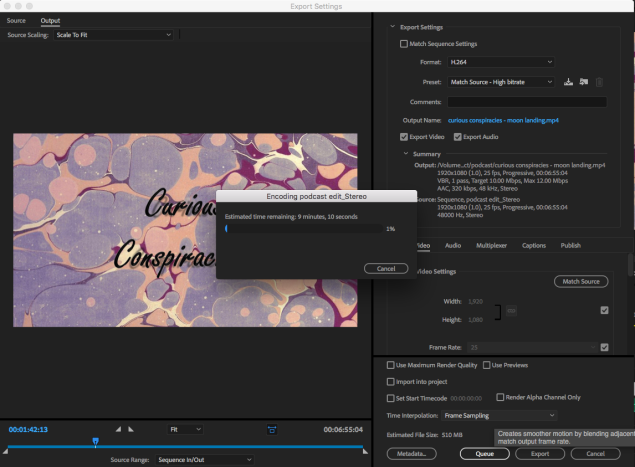
I then exported it as an MP4 track with a H.264 format:
When this finished I uploaded it to my YouTube:

Here’s the final podcast:
Reflection
My podcast was originally planned to be recorded with a zoom at home with my boyfriend, but as this was causing too much delay, I recorded it with Ella in the AV room, which improved my timing and the quality of the audio. I stuck to the planned genre, script and topic which created an interesting talk.
The changes in my plans actually improved my podcast and allowed me enough time to edit, upload and reflect.
I had a problem during editing, which was discovering that Ella’s audio was quite than mine and I didn’t know how to make it louder, but I researched how to make it louder and applied the dB switch to her parts of the dialogue which worked.
Overall I am satisfied with my podcast, it’s cover, edit and definitely its topic and content. Maybe next time I’ll aim to make it longer and do a test recording to save myself having to adjust volume in the final editing.
Podcast Recording
Today I recorded my podcast with Ella, talking about the topic ‘was the moon landing faked?’ I set up the AV room with
mic stands
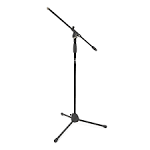
microphones

mic cables

and followed the script loosely along with Ella, asking questions and giving opinions. Opened up audition on the mac in the AV room and switched the default stereo input to mono; input 1 and then again but input 2 so I could record the two microphones. We then recorded for 30 minutes and I saved the recording onto my USB stick.
Final Music Video

Editing music video
My music video for Hannah Grace’s song ‘Praise You’ will consist of my own footage of natural scenes, like rain, grass, clouds, trees etc., found footage of natural scenes and footage of Hannah grace performing live. I will be using Premiere Pro to piece together my music video, add effects and transitions and anything else to make the video look how I want it to.
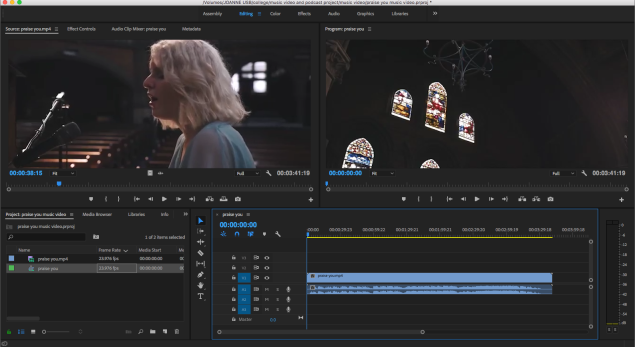
Firstly I synced the audio from the song and footage of Hannah performing live:
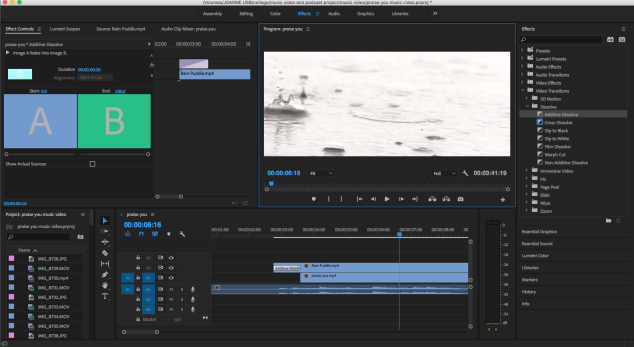
I then added in the first natural scene I wanted which was a found scene of a time-lapse of rain drops:
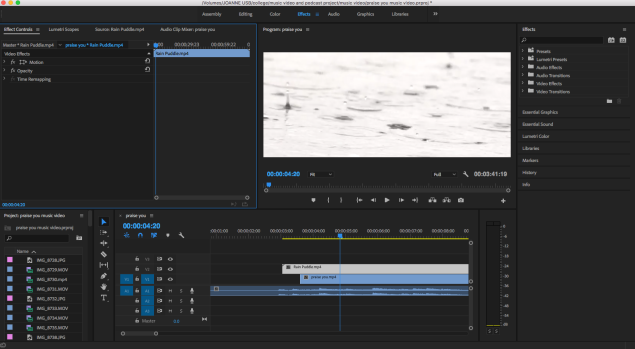
Afterwards, I added a video transition to the rain scene so that the footage flowed naturally and nicely:
I then experimented with some transitions and added some that I liked to other pieces of footage:
I wanted to reverse one of my clips but didn’t know how so I researched how to do it, found this video:
and did it:

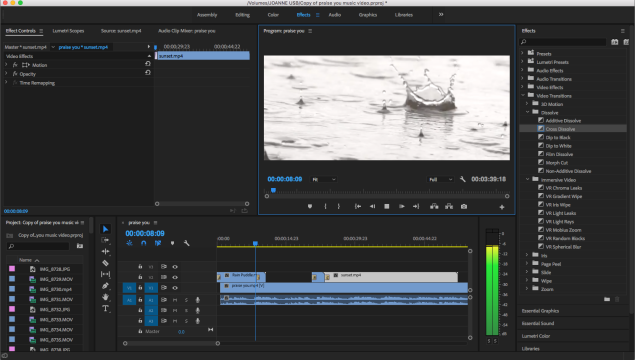
I realised that my sunset scene was a bit light towards the end and not creating the mood I wanted. To fix this, I darkened the image by adjusting the shadows and adding a grey tint:
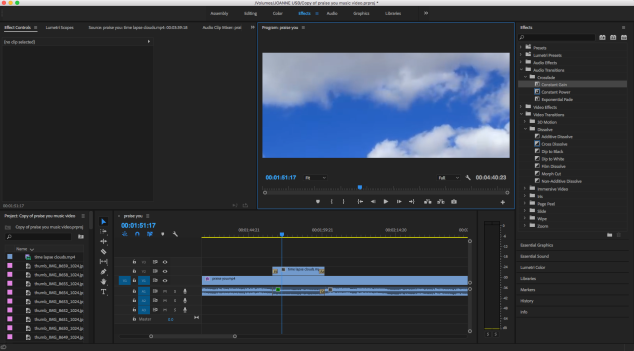
After this I added a new clip of a found time-lapse of clouds going past in the sky. It matched up nicely with my emotional and natural theme:
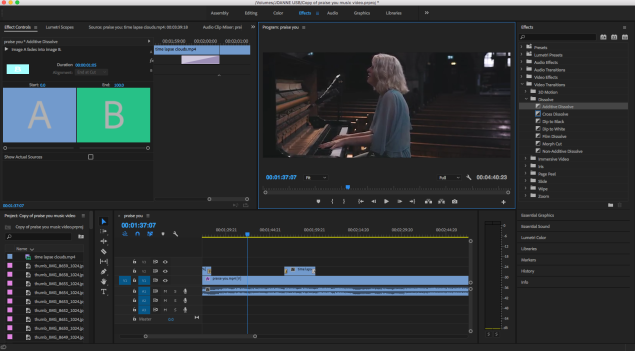
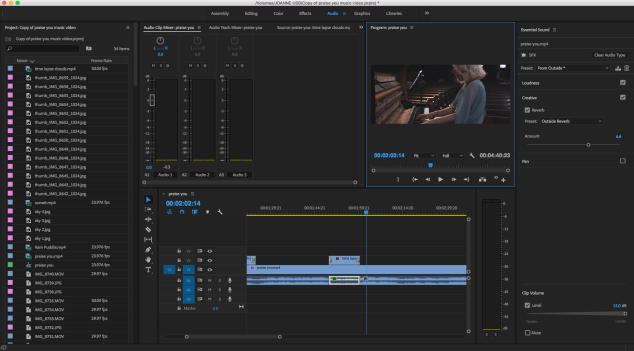
I wanted to add an audio effect even though it’s a music video task. I decided when I added my cloud time-lapse that it would be cool if it sounded like Hannah was singing outside. I researched how to create this effect and added it in to the part of audio that was playing over the cloud footage:
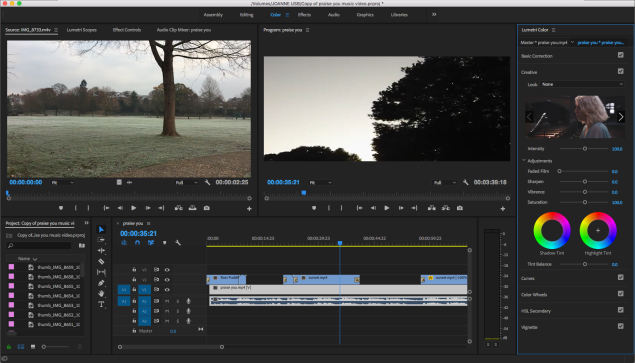
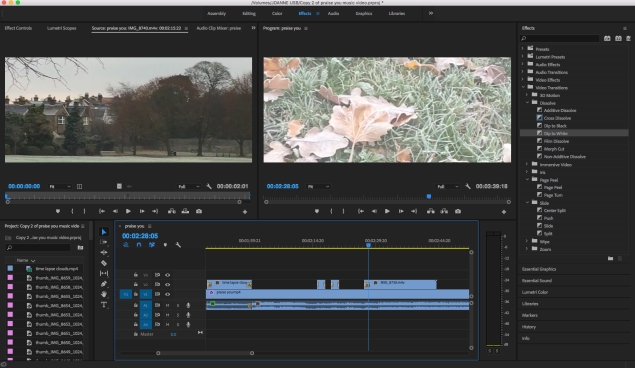
While reviewing some of my original footage, I watched some short clips and decided to use them alongside transitions in a certain part of the video because it had such a large emotional effect, almost as if they’re saddening memories, I’ve seen this effect used in videos before:

I also added a slow-mo video to match better with part of the audio where the song slowed down and the layers decreased. To transition this, I used the ‘dip to white’ transition to make it seem more like a thought of Hannah’s:
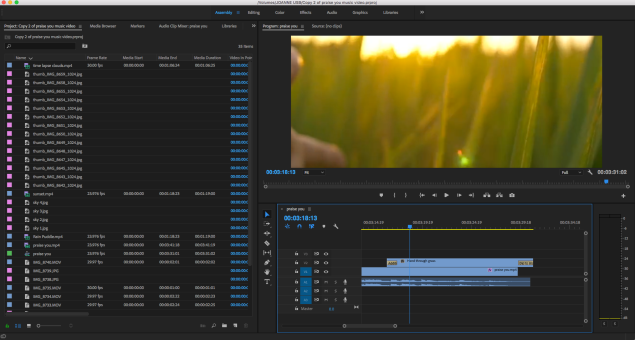
To end my music video, I wanted a natural scene as the audio at the end is very quiet and slowing down, slowly bringing the song to a nice end, so I wanted a clip to mirror this. I used a found scene of a hand sweeping through grass as I noticed it cuts off in the end as a fade. I also used a ‘cut to black’ transition effect for a maximised ending quality:
Finally, I reviewed my video and when I was happy I exported it and uploaded it to my student YouTube:

Filming reflections
I started filming on an unplanned day while walking through memorial park using my iPhone 6S as I thought the atmosphere looked suitable for parts of my music video. On the 16th of November 2018, I took photos and videos like this:


I wanted to use these photos and clips for the sadder parts of my song as the atmosphere is very dark and misty, also the rain settled on the floor made them have a sadder theme.
I also planned to take pictures and film clips on the 22nd of November 2018. I used both my phone and a samsung camcorder to capture footage like this:


Taken at both memorial park and along Redstone Hill.
Game Research
History Of Video Games
The first video game is considered to be ‘Spacewar!’ created in 1962 by Stephen Russel who was part of MIT. Two players each control a spaceship circling a planet. The players can shoot each other, turn their ships, and accelerate. The goal is to hit the other player before being hit yourself.

YouTube https://www.youtube.com/watch?v=eePWlLKm_Bg&w=560&h=315
The first game available to buy was called ‘Pong’ made in 1973, 11 years after spacewar! It’s a simple back and forth digital version of ping-pong, using basic graphics and numbering. This became inspiration for one of the biggest computer games ever, Space Invaders, made in 1977.

YouTube https://www.youtube.com/watch?v=MU4psw3ccUI?start=8&w=560&h=315
Most games made at the beginning of video game technology had a target of getting a high score, usually placed in public places, people would try to beat the highest score as the levels increased in difficulty. Nowadays, most video games are on private servers with set up accounts for players, people try to beat their own score, their friends or there is often another objective to the game like killing the other player(s) without dying.
Microsoft already had a huge technological impact on the world, but in November of 2001, it released the first ever Xbox – the Xbox One. The Playstation 1 had been released 7 years earlier in 1994 but wasn’t that popular. Playstation released the Playstation 2 in 2000 which was very popular and influenced Microsoft to release the Xbox. In 2006, Nintendo released the Wii, a console fitting for all ages and gamer types. Something small children as well as elderly people could enjoy. The release of these consoles influenced and changed game setup and the popularity of gaming by a considerable amount, not just for hardcore gamers – fans of the GameCube, GameBoy, PSP, Playstation and Xbox, but also for casual gamers who preferred to use Nintendo based consoles like the Wii and the DS.


Gaming was becoming increasingly popular with children as young as 8, with games like Crash Bandicoot and Spyro, one problem was the violent nature of some games being played, such as Mortal Kombat (first released in 1992), to fix this, violent and gory games were rated like movies were. This led to the creation of the ESRB. ESRB had 5 ratings for games: E – everyone, E 10+ – everyone over 10, T – teen, M – mature 17+, A – adult.

A huge leap in gaming was the release (and more importantly the development of) Steam. Games were restricted to DVD and CD purchase, for consoles and on PC. When Steam was released in 2003 no one really used it as it wasn’t mandatory for all Valve games and was just useful for mod games like Counter-Strike. But in 2004 when Half-Life 2 was released, it was mandatory to have it on Steam. When hundreds of thousands of people eager to play Half-Life 2 joined up to Steam, its servers just weren’t ready. People struggled to even start the game, even after painfully waiting 5 years for its release. After 2005, Steam opened up from Valve games after people started trusting it again, Steam now had games from id Software to Activision, Eidos to Capcom, because of the influence of Valve. Now Steam is the most used gaming software, an online forum for buying, selling and most importantly, playing games on PC.

There was always an expo for newly released technology, called the Consumer Electronics Show (CES). Although gaming releases weren’t looked at during this expo, they got barely any attention and were hard to access. So in 1995, the Interactive Digital Software Association (IDSA) set up E3. Sega was a huge supporter, but Nintendo was reluctant. After seeing the mass support it decided to join as well. It was at one of these expo’s that Nintendo released one of its most popular consoles – the Nintendo 64. The E3 Expo still goes on today, held in the Los Angeles Convention centre every year, continuously announcing new games, graphics developments, storage developments and consoles.

Gaming hasn’t always been successful from the start, in fact in 1983, there was a ‘gaming crash’. At its peak, games and consoles combined were worth a huge $11.8 billion! In 1983, profits went down by a whole 97%. By 1985, the profits had gone down from $11.8 billion, the just $100 million. Sounds like a lot but this was shared over all gaming console companies and games. The crash can be put down to many things but the main reason was because of the rivalry between companies. As one company produced a game with new things, others rushed to do the same and released rubbish games that people didn’t like. Although this crash led to the growth in popularity of Nintendo, as Americans turned away from US produced games and to Japanese produced ones. Nintendo also learned from Atari’s (the previously leading gaming company) mistakes.
Bibliography:
A history of the computer game. Available: https://www.jesperjuul.net/thesis/2-historyofthecomputergame.html. Last accessed 14/11/2018.
Boon, E. (2011). THE HISTORY OF MORTAL KOMBAT. Available: https://uk.ign.com/articles/2011/05/05/the-history-of-mortal-kombat. Last accessed 21/11/2018.
Douglas, A. (2012). TIMELINE: The 40-Year Evolution Of Video Game Consoles. Available: https://www.businessinsider.com.au/without-these-game-consoles-we-wouldnt-be-playing-angry-birds-on-our-iphones-2012-8#atari-pong-1. Last accessed 21/11/2018.
ESRB. (1994). ESRB ratings. Available: http://www.esrb.org/. Last accessed 21/11/2018.
IGN. (2013). A Brief History of Electronic Entertainment Expo. Available: https://uk.ign.com/wikis/e3/A_Brief_History_of_Electronic_Entertainment_Expo. Last accessed 21/11/2018.
Lambie, R. (2013). The 1983 videogame crash: what went wrong, and could it happen again?. Available: https://www.denofgeek.com/games/24531/the-1983-videogame-crash-what-went-wrong-and-could-it-happen-again. Last accessed 21/11/2018.
Plunkett, L. (2013). Steam is 10 today. Remember when it sucked?.Available: https://kotaku.com/steam-is-10-today-remember-when-it-sucked-1297594444. Last accessed 21/11/2018.
Sanders, K. (2006). US WII PRICE, LAUNCH DATE REVEALED. Available: https://uk.ign.com/articles/2006/09/14/us-wii-price-launch-date-revealed. Last accessed 21/11/2018.
watchmojo.com. (2017). op 10 Dates That Changed Gaming Forever.Available: https://www.youtube.com/watch?list=PLWfyT5q3mwgn-GK5Qe9DKePCECfjTLmIb&v=mnMmrU9I5t0. Last accessed 21/11/2018.
Primary Location research
Primary images of Memorial Park. Taken 16/11/2018.

Weather is cold and windy, some mist present. No sunshine.
Some issues filming at this location might be that the weather isn’t how I want it to be and at busy times it’s hard to find an area with no people.


Premiere effects research – music video
I want my music video to involve specific effects to get the result I want. For example, I want to have a time-lapse of clouds and rain in my video. I also want some slow motion and sped up scenes. For some of my footage I also want to include colour corrections to make them darker or lighter depending on the mood I want to create with them.
I researched on YouTube how to speed up a video and watched this video, which taught me how to do it:
youtube https://www.youtube.com/watch?v=nVFsD22ES_4&w=560&h=315
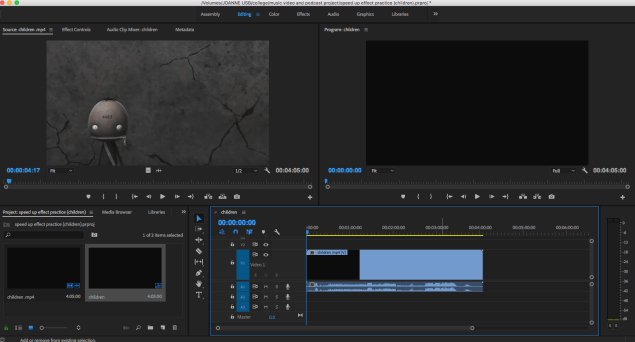
I then tried it out myself on a regular video from YouTube called ‘Children’:
Firstly I imported my video:
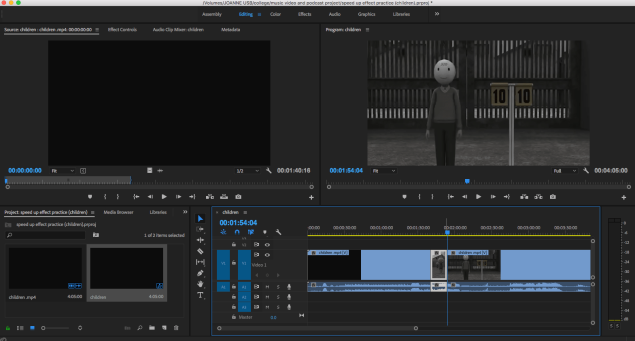
Then I used the command key and the K key to cut my video where I wanted it to be sped up:
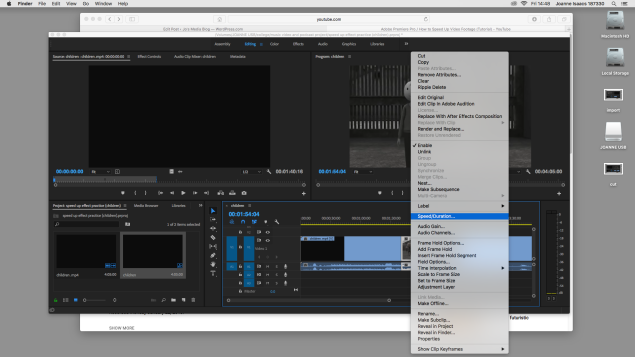
After dong this I right clicked over my section of the video and pressed ‘speed/duration’
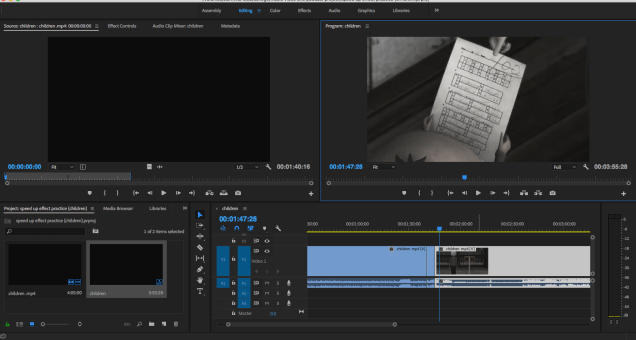
It then came up with a box and I simply set the speed from 100% to 300%. After doing this the size of the clip from the sequence decreased, if I was to slow it down, it would increase.
I then uploaded it to YouTube:
youtube https://www.youtube.com/watch?v=QE6A_Yxmkko&w=560&h=315
In order to slow down my video, I’d have to go through the exact same process, but reduce the speed percentage instead of increase it.
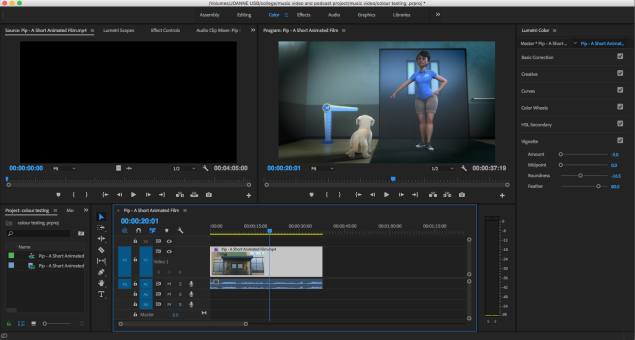
To figure out colour changing on Premiere Pro, I decided to download a short film and do a few tests as primary research. I used this short animation:
youtube https://www.youtube.com/watch?v=07d2dXHYb94?start=19&w=560&h=315
and done a few tests on premiere:
Firstly I cut the video down as I only needed a small part to practice on:

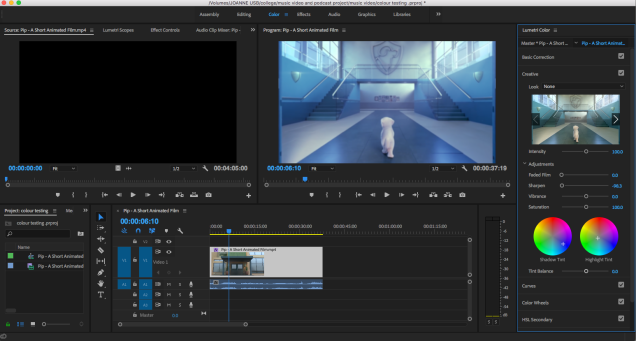
Then I practiced a colour tint using the colour wheel, making the overall tint blue:

Afterwards I experimented with sharpness and blur techniques:
blurred:
sharpened: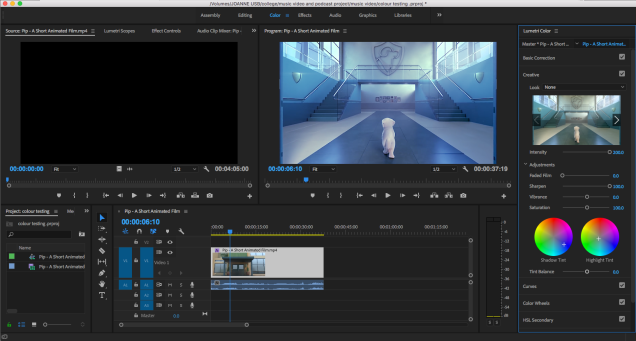
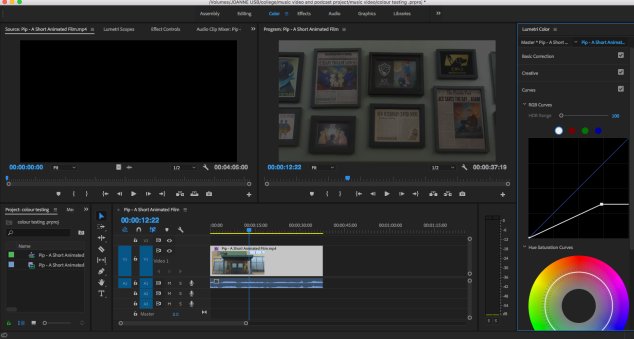
I then experimented with levels of light:
darkened:
brightened: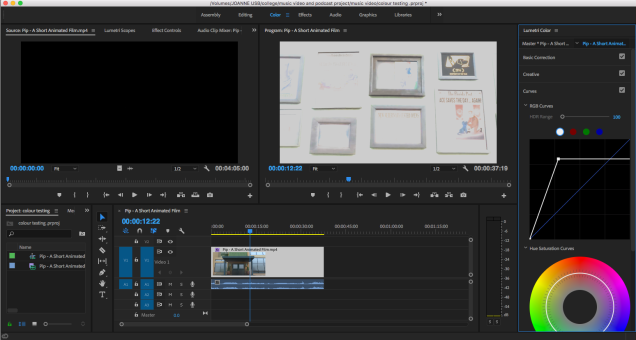
Lastly I experimented with the vignette tool: